

Basic of Post-installed rebar in EC2
Post-Installed Rebar (PIR) Design
Post-installed rebar (PIR) is a common construction method in the industry for Addition & Alteration (A&A) works and extension in structural elements. However, there are often enquiries about the anchorage depth of the rebar & the myth of “10D” and confusion on how to calculate the depth in a proper way. Therefore, in this article, we will discuss more on the calculation method and design rationale for PIR design.
Identifying the connection and the corresponding design approach (PIR Vs Anchor)

The crucial first step before calculation is to correctly identify the connection type of your application. It is very common for engineers to mix up post-installed rebar and chemical anchor using rebar. The key difference between post-installed rebar & chemical anchor is the interface of the connection. Post-installed rebar connection involves two concrete elements while anchor connection involves concrete and steel plate.
Differences between PIR Design and Anchor Design
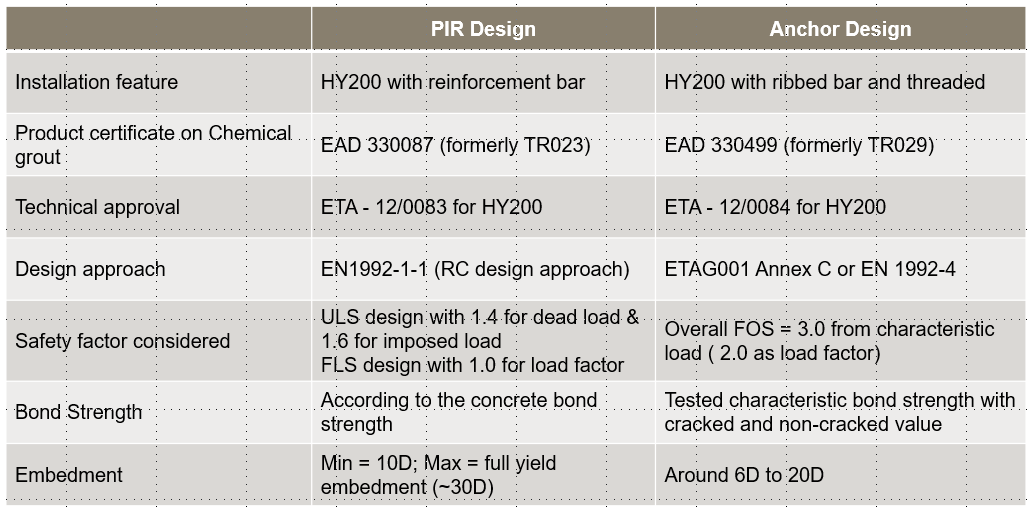
The PIR & anchor design are difference in many aspects, such as design approach, approval standard, safety factor etc. It is very important to identify the connection type in your application before moving on to calculation.
EC2 Design for Post-installed rebar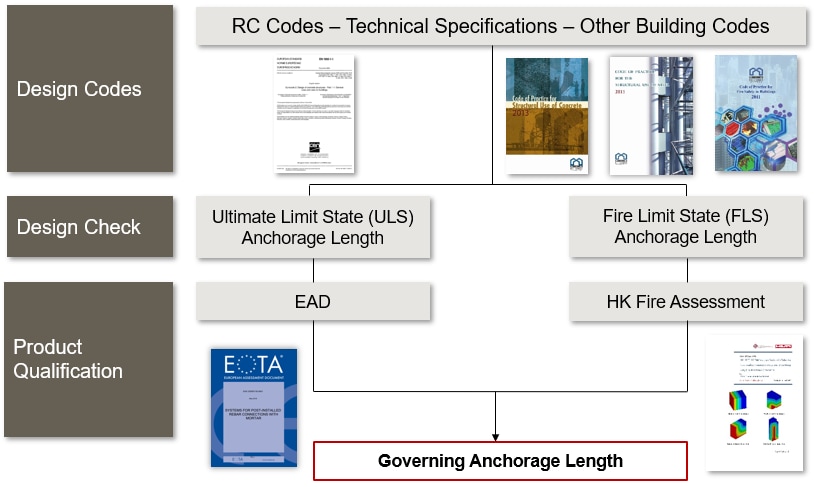
After confirming the post-installed rebar application, we can move on to the design state.
This is the overview of the EC2 design for post-installed rebar. The design codes are EC2 and localized codes such as Cod of Practice for Structural Use of Concrete 2013, Structural Use of Steel 2011, Fire Safety in Buildings 2011.
There are two design checks in order to obtain the anchorage length – Ultimate Limited State (ULS) & Fire Limit State (FLS), which will be covered in coming articles.
